文章目录(Table of Contents)
简介
这里介绍一个我个人觉得比较好用的 Latex 的模版, ElegantLaTeX, 这个模版是一个系列的, 包含 Note, Book 和 Paper。这个系列的 LaTeX 的模板真的非常好,大家也可以多去使用。
如果要使用上面的模板,可以直接在上面的 GitHub 链接下载最新的文件。严格意义上只需要类文件 elegantbook.cls。然后将模板文件放在你的工作目录下即可使用。
关于 ElegantLaTeX 系列,有一些其他用户的作品,链接为 Elegant LaTeX 用户作品集,可以多参考其他人的作品。相互学习。
ElegantBook 相关
ElegantBook 编译相关
ElegantBook 支持 pdfLaTeX 和 xeLaTeX 编译。中文尽量使用 xeLaTeX 来进行编译。如果抄录环境 (lstlisting)有中文字符,那么务必使用 xeLaTeX 来进行编译。
关于 package fontspec: xxx cannot be found 的问题
出现这个问题则更新 ElegantBook 的最新模板即可。可以参考相关的 issue,关于 package fontspec: xxx cannot be found 的问题。
相关的问题有:windows10下楷体找不到?
如果想要安装额外的字体,可以点击链接,latex-chinese-fonts,进行下载和安装。
ElegantBook 全局设置
语言模式-中文或是英文
首先我们可以更改 ElegantLaTeX 的语言模式。可以使用 lang=cn、lang=en 以及 lang=it 来启用三套不同的语言环境。不同的语言环境的启用如下所示:
- \documentclass[lang=cn]{elegantbook}
设备模式-pad 或是 A4
我们也可以修改设备模式。可以设置 device=pad,这样会使得生成的 pdf 的适配 ipad,无需放大,切边也可以直接查看,在 pad 的查看体验可以有巨大的提升。可以使用下面的选项将版面设置为 iPad 设备模式,默认情况下是 device=normal,也就是 A4 的大小:
- \documentclass[device=pad]{elegantbook}
颜色主题
我们也可以修改整个主题的颜色,设置颜色主题。本模板内置 5 组颜色主题,分别为 green、cyan、blue(默认)、gray、black。另外还有一个自定义的选项 nocolor。调用颜色主题 green 的方法为:
- \documentclass[color=green]{elegantbook}
下图是不同颜色主题下,每一个模块的颜色,下面每一个模块具体是什么会在后面介绍:
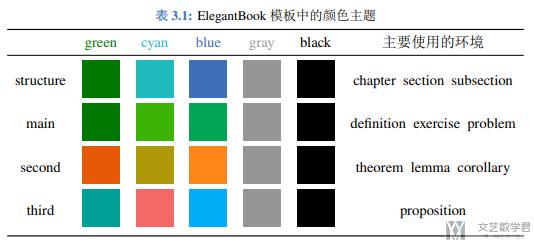
如果需要自定义颜色的话请选择 nocolor 选项或者使用 color=none,然后在导言区定义 structurecolor、main、second、third 颜色,具体方法如下:
- \definecolor{structurecolor}{RGB}{0,0,0}
- \definecolor{main}{RGB}{70,70,70}
- \definecolor{second}{RGB}{115,45,2}
- \definecolor{third}{RGB}{0,80,80}
代码高亮
我们使用 lstlisting 来进行代码高亮。我们可以在文档开头部分进行样式的设置:
- \documentclass{ctexart}
- \usepackage{listings}
- \usepackage{xcolor}
- \lstset{
- columns=fixed,
- numbers=left, % 在左侧显示行号
- frame=none, % 不显示背景边框
- backgroundcolor=\color[RGB]{245,245,244}, % 设定背景颜色
- keywordstyle=\color[RGB]{40,40,255}, % 设定关键字颜色
- numberstyle=\footnotesize\color{darkgray}, % 设定行号格式
- commentstyle=\it\color[RGB]{0,96,96}, % 设置代码注释的格式
- stringstyle=\rmfamily\slshape\color[RGB]{128,0,0}, % 设置字符串格式
- showstringspaces=false, % 不显示字符串中的空格
- language=c++, % 设置语言
- }
- \begin{document}
- {\setmainfont{Courier New Bold} % 设置代码字体
- \begin{lstlisting}
- #include <iostream>
- int main()
- {
- std::cout << "Hello, World!" << std::endl;
- }
- \end{lstlisting}}
- \end{document}
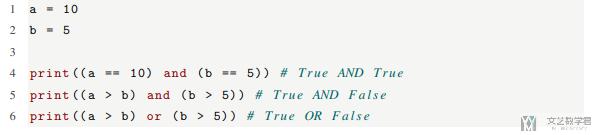
上面的语言设置的是 c++,如果想要高亮 python,我们只需要设置为 Python 即可。当上面设置完毕之后,我们就可以高亮 Python 代码,如下所示:
- \begin{lstlisting}[language=Python]
- a = 10
- b = 5
- print((a == 10) and (b == 5)) # True AND True
- print((a > b) and (b > 5)) # True AND False
- print((a > b) or (b > 5)) # True OR False
- \end{lstlisting}
最终显示的效果如下所示:
ElegantBook 中不同的样式--中文模式下
首先是笔记样式,可以让段落前有「笔记的字样」,使用 begin 中增加 note 关键词。
- \begin{note}
- ....
- \end{note}
最终的结果如下所示:

ElegantBook中目录深度设置
使用setcounter控制目录深度. 例子如下所示.
- \documentclass[lang=en]{elegantbook}
- \begin{document}
- \setcounter{tocdepth}{2}
- \tableofcontents
- \chapter{content}
- \section{content}
- \subsection{content}
- \subsubsection{content}
- \end{document}
ElegantPaper相关
编译顺序
我们使用如下的顺序进行编译
- Full chain: pdflatex -> bibtex -> pdflatex -> pdflatex
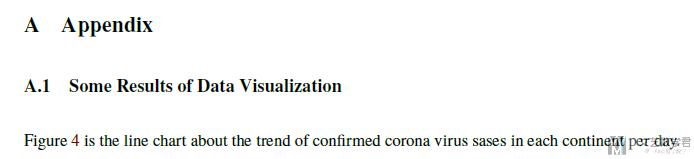
关于Appendix
在ElegantPaper后面加上appendix的说明.
- \appendix
- % ------------------------
- \section{Appendix} \label{appendix}
最后显示结果如下所示:
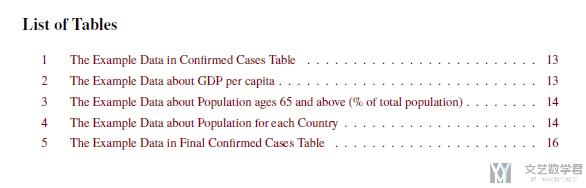
关于增加表格和图片的目录
有的时候, 我们需要在文章前面增加表格和图片的目录.
- \listoffigures
- \clearpage
- \listoftables
- \clearpage
最后的结果如下所示:
参考文献引用
在引用文献的时候, 如果我们想要修改为Author-Year这种格式, 我们只需要在documentclass中进行修改即可, 也就是加上cite=authoryear就可以, 详细的如下所示:
- \documentclass[11pt, en, cite=authoryear]{elegantpaper}
之后, 在引用的时候, 只需要使用下面的方式引用即可:
- \citep{keerthana2017heart}
关于更多Latex参考文献的内容, 可以参考: LaTeX指南信息--参考文献
Logo的插入
其实这一部分的内容是不属于ElegantLaTeX的, 这个的插入和这个模板没有关系. 不过因为是在用这个模板的时候想要用到的这个功能, 所以就放在了这里.
我们想要在这里实现在文章标题前插入一个图片, 实现类似水印(logo)的作用, 一会直接看效果吧.
- \title{XXXXXXXX}
- \author{{Wang}}
- \institute{{Management of Information System Projects}}
- \begin{document}
- % \maketitle
- \vbox{
- \raggedright
- \includegraphics[width=45mm]{./figure/UiA.png} % 在标题前面插入一个logo
- \maketitle %this typesets the contents of \title, \author and \date
- }
- \section{A}
- \end{document}
最终的实现效果如下图所示, 我们可以通过修改上面图片的width来修改图片的大小.

参考资料: Add a picture before book title
关于引用的格式
同样, 这一部分也是不属于这个模板的, 但是因为在这里有用到, 所以就在这里提一下. 我们也会将这部分的内容在中进行提及.
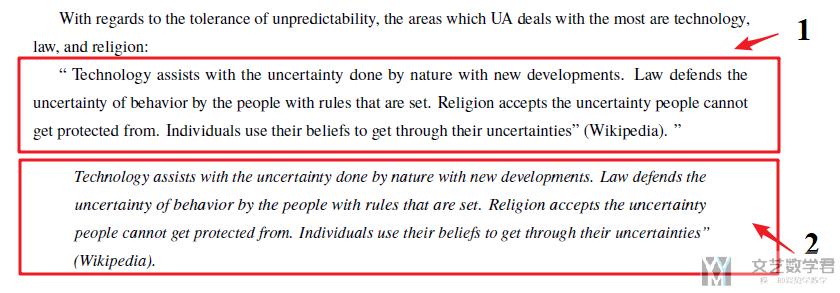
我们使用下面的方式来完成引用的实现.
- \usepackage{csquotes}
- \renewcommand{\mkbegdispquote}[2]{\itshape}
- % 加双引号的引用
- \blockquote{
- Technology assists with the uncertainty done by nature with new developments. Law defends the uncertainty of behavior by the people with rules that are set. Religion accepts the uncertainty people cannot get protected from. Individuals use their beliefs to get through their uncertainties” (Wikipedia).
- }
- % 这是斜体
- \begin{displayquote}
- Technology assists with the uncertainty done by nature with new developments. Law defends the uncertainty of behavior by the people with rules that are set. Religion accepts the uncertainty people cannot get protected from. Individuals use their beliefs to get through their uncertainties” (Wikipedia).
- \end{displayquote}
最终的实现效果如下图所示:
- 微信公众号
- 关注微信公众号
-

- QQ群
- 我们的QQ群号
-


评论