文章目录(Table of Contents)
简介
这一篇会介绍关于LightGBM的简单的使用,原理方面这一篇不会涉及,会在别的文章里进行介绍。
参考资料
参数介绍
导入数据常用参数
- feature_name (list of strings or 'auto', optional (default="auto")) – Feature names. If 'auto' and data is pandas DataFrame, data columns names are used.
- free_raw_data (bool, optional(default=True)) – If True, raw data is freed after constructing inner Dataset.(用来释放内存)
- weight (list, numpy 1-D array, pandas Series or None, optional(default=None)) – Weight for each instance.(每个样本的权重)
- reference (Dataset or None, optional(default=None)) – If this is Dataset for validation, training data should be used as reference.(如果数据用来做validation, training data应该作为reference)
模型常用参数介绍
这里就介绍一下常用的参数,具体的参数说明可以查看链接 : Parameters, 中文参数说明
- objective(任务类型)
- regression(回归)
binary, binary log loss classification (or logistic regression). Requires labels in {0, 1}; seecross-entropyapplication for general probability labels in [0, 1](0,1二分类)
learning_rate,default =0.1, type = double, aliases:shrinkage_rate,eta, constraints:learning_rate > 0.0num_leaves, default =31, type = int, aliases:num_leaf,max_leaves,max_leaf, constraints:num_leaves > 1- max number of leaves in one tree(一个树的最大叶子节点, 越多分类效果越好,但是会容易出现过拟合的现象)
- 下面是一个层数和叶子节点个数的关系(这里假设是满树, 一般层数不要超过7层,但因为可能不是满树,所有100+的叶子节点树可能会很深)

- metric(计算误差的函数)
feature_fraction(特征的选择), default =1.0, type = double, aliases:sub_feature,colsample_bytree, constraints:0.0 < feature_fraction <= 1.0- LightGBM will randomly select part of features on each iteration if
feature_fractionsmaller than1.0. For example, if you set it to0.8, LightGBM will select 80% of features before training each tree.(不会使用全部的特征进行训练,会选择部分特征进行训练) - can be used to speed up training(加快训练速度)
- can be used to deal with over-fitting(防止出现过拟合)
- LightGBM will randomly select part of features on each iteration if
feature_fraction_seed, default =2, type = int- random seed for
feature_fraction - 可以用来做模型的融合(两个模型选择的特征是不一样的)
- random seed for
bagging_fraction(数据的选择), default =1.0, type = double, aliases:sub_row,subsample,bagging, constraints:0.0 < bagging_fraction <= 1.0- like
feature_fraction, but this will randomly select part of data without resampling(训练的时候会选择部分数据进行训练, 且不会重复取值, 这里代表的是每次迭代的时候使用的数据的比例) - can be used to speed up training
- can be used to deal with over-fitting
- Note: to enable bagging,
bagging_freqshould be set to a non zero value as well
- like
bagging_freq, default =0, type = int, aliases:subsample_freq- frequency for bagging(每次)
0means disable bagging;kmeans perform bagging at everykiteration- Note: to enable bagging,
bagging_fractionshould be set to value smaller than1.0as well
训练常用参数
num_iterations(迭代次数),default =100, type = int, aliases:num_iteration,n_iter,num_tree,num_trees,num_round,num_rounds,num_boost_round,n_estimators, constraints:num_iterations >= 0- number of boosting iterations
categorical_feature(用来指定哪些是类别特征), default ="", type = multi-int or string, aliases:cat_feature,categorical_column,cat_column- used to specify categorical features
- use number for index, e.g.
categorical_feature=0,1,2means column_0, column_1 and column_2 are categorical features(使用的方式) - add a prefix
name:for column name, e.g.categorical_feature=name:c1,c2,c3means c1, c2 and c3 are categorical features - Note: only supports categorical with
inttype(只支持int数据类型) - Note: index starts from
0and it doesn't count the label column when passing type isint - Note: all values should be less than
Int32.MaxValue(2147483647) - Note: using large values could be memory consuming. Tree decision rule works best when categorical features are presented by consecutive integers starting from zero
- Note: all negative values will be treated as missing values
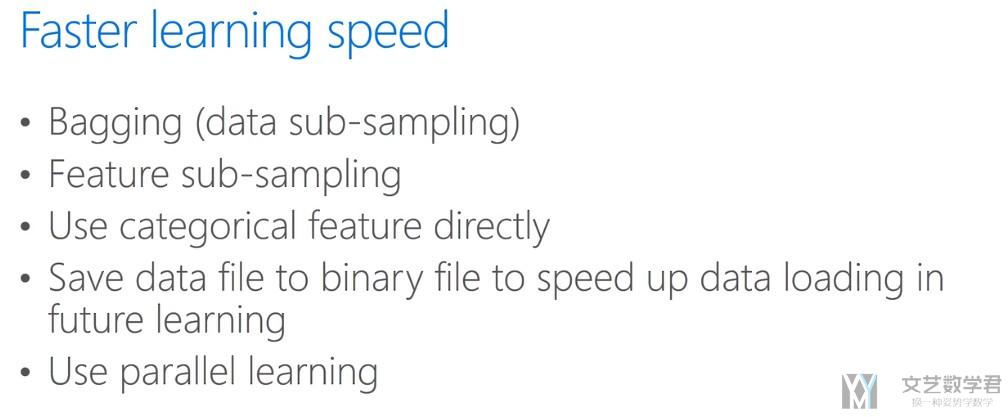
加快训练速度的建议
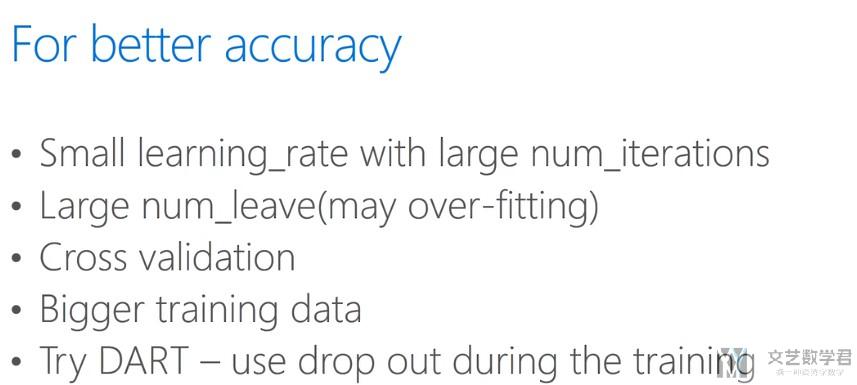
获得更高的准确率
防止过拟合
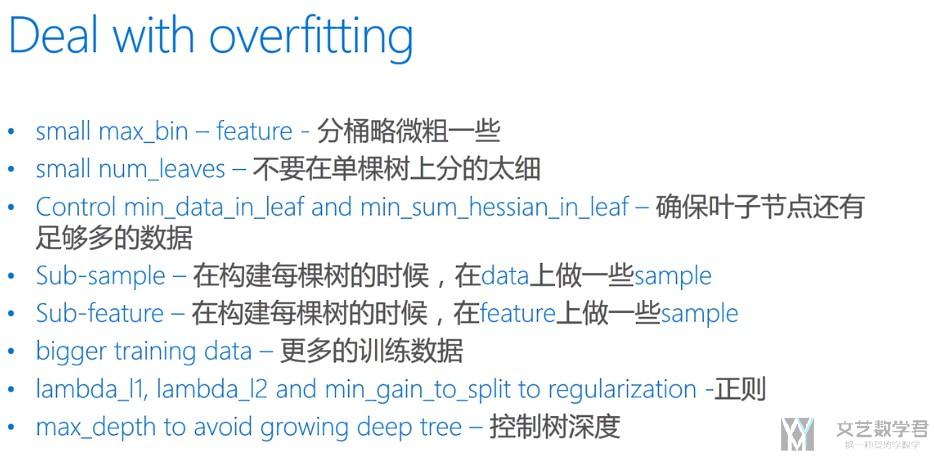
其中的第三条和第五条通常会有较好的效果。
LightGBM例子说明
这一部分简单说明一下LightGBM的具体的使用。所有内容来源于官方的例子。Python-package Examples
Simple LightGBM Example(Regression)
这一部分是一个简单的LightGBM来做回归的例子。在这里主要说明下面的几个问题。
- 创建数据集(1. 导入数据集, 2. 创建LightGBM的dataset)
- 基本的训练和预测(参数的设置)
- 在训练过程中进行测试
- 提前停止训练
- 将模型保存到文件(保存为txt文件)
准备工作及创建数据集
首先做一下准备工作。
- import lightgbm as lgb
- import pandas as pd
- from sklearn.metrics import mean_squared_error
接着创建数据集,导入数据并创建lightgbm的dataset.
- df_train = pd.read_csv('../regression/regression.train', header=None, sep='\t')
- df_test = pd.read_csv('../regression/regression.test', header=None, sep='\t')
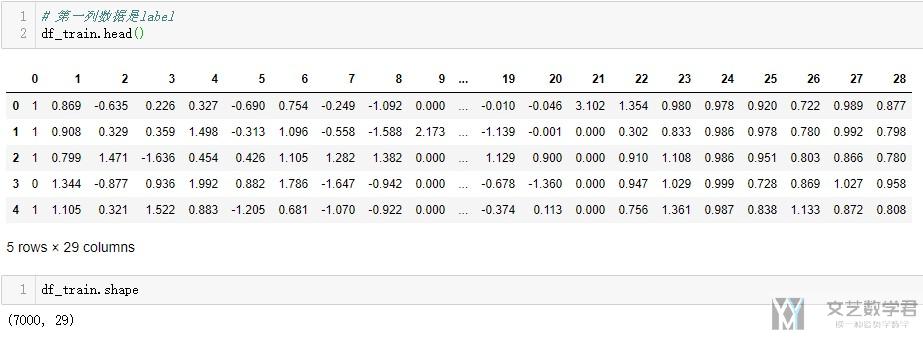
查看一下数据集的大概的内容和大小。
- # -----------
- # 切分数据集
- # -----------
- x_train = df_train.drop(0,axis=1) # 获得训练集的x
- y_train = df_train[0] # 获取训练集的y
- x_test = df_test.drop(0,axis=1) # 获取测试集的x
- y_test = df_test[0] # 获取测试集的y
- # ------------------------------
- # create dataset for lightgbm
- # ------------------------------
- lgb_train = lgb.Dataset(x_train, y_train)
- lgb_eval = lgb.Dataset(x_test, y_test, reference=lgb_train)
模型的训练和模型的保存
下面进行参数的设置,模型的训练和模型的保存。
首先进行参数的设置。
- params = {
- 'boosting_type': 'gbdt',
- 'objective': 'regression',
- 'metric': {'l2', 'l1'}, # l1和l2代表两种误差计算
- 'num_leaves': 31,
- 'learning_rate': 0.05,
- 'feature_fraction': 0.9,
- 'bagging_fraction': 0.8,
- 'bagging_freq': 5,
- 'verbose': 0
- }
开始模型的训练。传入设定的参数,训练的数据,验证的数据。
- gbm = lgb.train(params,
- lgb_train,
- num_boost_round=20,
- valid_sets=lgb_eval,
- early_stopping_rounds=5)
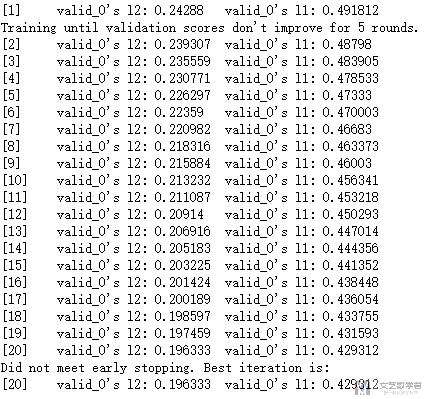
打印的结果,l1和l2分别表示两个误差的计算结果。
训练完毕之后,即可以进行模型的保存。
- # 保存模型
- gbm.save_model('Regressionmodel.txt')
模型的预测
最后,使用我们训练完毕的模型来进行预测。预测的输入可以是dataframe的格式。
- y_pred = gbm.predict(x_test, num_iteration=gbm.best_iteration)
Simple LightGBM Example(Classification)
上面介绍了关于回归的模型, 这里介绍一下多分类模型的使用的方式. 我们就主要介绍一下不同的地方.
参数的设置
对于多分类的模型, 主要关注的是objective, metric, num_class这三个参数. 特别是要注意的是, 我们需要设置num_class, 即类别的个数.
- params = {
- 'boosting_type': 'gbdt',
- 'objective': 'multiclass',
- 'num_class':6,
- 'metric': {'multi_logloss'}, # l1和l2代表两种误差计算
- 'num_leaves': 15,
- 'learning_rate': 0.1,
- 'feature_fraction': 0.9,
- 'bagging_fraction': 0.8,
- 'bagging_freq': 5,
- 'verbose': 0
- }
之后关于训练的方式就是和上面是一样的了. 下面看一下查看每一个特征的重要度的方式.
查看特征的重要度
- # 打印特征的重要度
- gbm.feature_importance()
Advanced LightGBM Example
这一部分是一个关于LightGBM进一步使用的例子(还是使用官网的例子进行说明)。主要介绍以下的内容。
- 初始设置样本权重
- 模型的三种保存方式(1. 保存为txt格式, 2. 保存为json格式, 3. 使用pickle保存)
- 模型的继续训练(将保存的模型重新导入, 继续训练)
- 训练过程中逐渐减小learning rate
- 训练过程中修改参数
- 训练过程中使用自定义的目标函数和评估函数
- 打印特征重要程度(设置特征的名字)
导入样本数据并设置权重
准备工作,导入相应的库。
- import json
- import lightgbm as lgb
- import pandas as pd
- import numpy as np
- from sklearn.metrics import mean_squared_error
- try:
- import cPickle as pickle
- except BaseException:
- import pickle
首先我们导入训练数据,并给每一个instance设置权重.
- # 读入数据
- df_train = pd.read_csv('../binary_classification/binary.train', header=None, sep='\t')
- df_test = pd.read_csv('../binary_classification/binary.test', header=None, sep='\t')
- # 读入一个权重数据
- W_train = pd.read_csv('../binary_classification/binary.train.weight', header=None)[0]
- W_test = pd.read_csv('../binary_classification/binary.test.weight', header=None)[0]
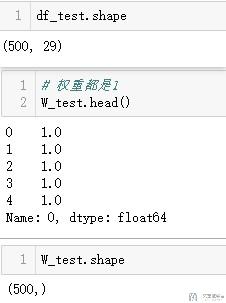
可以看到设置权重的大小和样本个数是一样的,且目前权重都设置为1。接着我们创建对应的数据集。
- y_train = df_train[0]
- y_test = df_test[0]
- x_train = df_train.drop(0, axis=1)
- x_test = df_test.drop(0, axis=1)
- # 创建数据集
- lgb_train = lgb.Dataset(x_train, y_train, weight=W_train, free_raw_data=False)
- lgb_eval = lgb.Dataset(x_test, y_test, weight=W_test, free_raw_data=False, reference=lgb_train)
模型的训练与保存
接着我们简单将模型训练以下,并进行保存。首先我们设置参数。
- params = {
- 'boosting_type': 'gbdt',
- 'objective': 'binary',
- 'metric': ['binary_logloss','auc'],
- 'num_leaves': 31,
- 'learning_rate': 0.05,
- 'feature_fraction': 0.9,
- 'bagging_fraction': 0.8,
- 'bagging_freq': 5,
- 'verbose': 0
- }
- # 产生feature name => 用来训练的时候给feature起名字
- num_train, num_feature = x_train.shape
- feature_name = ['feature_' + str(col) for col in range(num_feature)]
- print(feature_name)
- """
- ['feature_0', 'feature_1', 'feature_2', 'feature_3', 'feature_4', 'feature_5', 'feature_6', 'feature_7', 'feature_8', 'feature_9', 'feature_10', 'feature_11', 'feature_12', 'feature_13', 'feature_14', 'feature_15', 'feature_16', 'feature_17', 'feature_18', 'feature_19', 'feature_20', 'feature_21', 'feature_22', 'feature_23', 'feature_24', 'feature_25', 'feature_26', 'feature_27']
- """
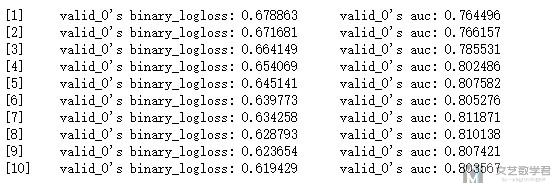
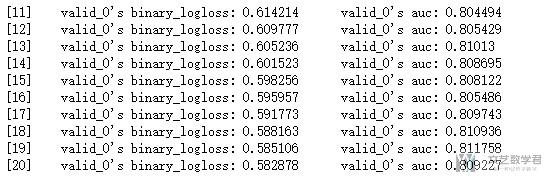
接着我们进行训练,这次打印一下auc。
- # 模型的训练
- gbm = lgb.train(params,
- lgb_train,
- num_boost_round=10,
- valid_sets = lgb_eval,
- feature_name=feature_name,
- categorical_feature=[21])
接下来就是模型的保存。在这里我们会介绍三种模型保存的方式。
- 模型保存方式一 : 保存为txt格式
- # 模型的保存--保存方式1
- gbm.save_model('BinaryModel.txt')
- # 加载保存的模型
- bst = lgb.Booster(model_file='BinaryModel.txt')
- # 这样保存只能保存最好的一个iteration
- # can only predict with the best iteration (or the saving iteration)
- y_pred = bst.predict(x_test)
- 模型保存方式二 : 保存为json格式
- # 将模型转为json格式, 并保存到文件--保存方式2
- model_json = gbm.dump_model()
- with open('BinaryModel.json','w+') as f:
- json.dump(model_json, f, indent=4)
- 模型保存方式三 : 使用pickle进行保存
- # 模型的保存, 使用pickle
- # dump model with pickle
- with open('model.pkl', 'wb') as fout:
- pickle.dump(gbm, fout)
- # load model with pickle to predict
- with open('model.pkl', 'rb') as fin:
- pkl_bst = pickle.load(fin)
- # can predict with any iteration when loaded in pickle way
- # 指定使用某一次迭代的结果进行预测
- y_pred = pkl_bst.predict(x_test, num_iteration=7)
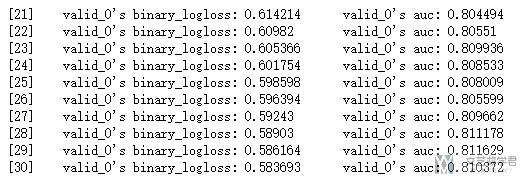
模型的继续训练
我们可以对保存的模型进行继续训练。我们使用init_model来完成模型的继续训练。
- # 10-20次训练
- gbm = lgb.train(params,
- lgb_train,
- num_boost_round=10,
- init_model='BinaryModel.txt',
- valid_sets=lgb_eval,
- categorical_feature=[21])
我们可以看到这里是继续从11-20开始训练,上面第一次我们是训练了10个iterations。
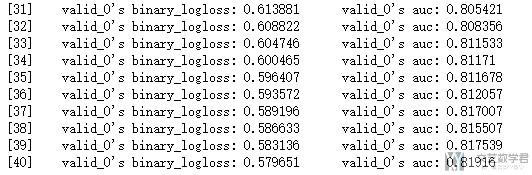
训练过程逐步减少lr
同时在训练的过程中,我们还可以设置学习率是逐步减小的。
- # 20-30次训练
- # 学习率递减
- gbm = lgb.train(params,
- lgb_train,
- num_boost_round=10,
- init_model=gbm,
- learning_rates=lambda iter:0.05 * (0.99**iter),
- valid_sets=lgb_eval,
- categorical_feature=[21])
训练过程修改参数
除了上面的学习率可以变化之外,我们还可以对参数其他参数进行修改。如这里我们修改了bagging_fraction的值。
- # 30-40次训练
- # 在训练过程中修改参数
- gbm = lgb.train(params,
- lgb_train,
- num_boost_round=10,
- init_model=gbm,
- valid_sets=lgb_eval,
- categorical_feature=[21],
- callbacks=[lgb.reset_parameter(bagging_fraction=[0.7]*5 + [0.6]*5)])
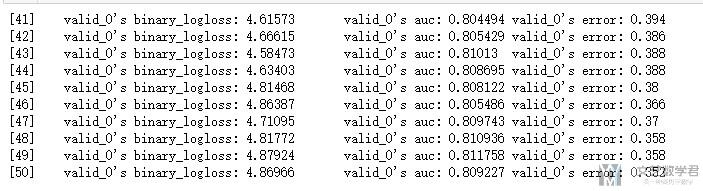
自定义目标函数和损失函数
- # 40-50次训练
- # 自定义目标函数
- def loglikelihood(preds, train_data):
- labels = train_data.get_label()
- preds = 1. / (1. + np.exp(-preds))
- grad = preds - labels
- hess = preds * (1. - preds)
- return grad, hess
- # 自定义损失函数
- def binary_error(preds, train_data):
- labels = train_data.get_label()
- return 'error', np.mean(labels != (preds > 0.5)), False
使用上述的损失函数。
- gbm = lgb.train(params,
- lgb_train,
- num_boost_round=10,
- init_model=gbm,
- fobj=loglikelihood, # 自定义目标函数
- feval=binary_error, # 自定义评估函数
- valid_sets=lgb_eval,
- categorical_feature=[21])
模型特征重要度分析
做完上面的工作之后,我们可以分析一下模型的特征的重要程度。
- # 打印feature name
- print('Feature names : ', gbm.feature_name())
- """
- Feature names : ['feature_0', 'feature_1', 'feature_2', 'feature_3', 'feature_4', 'feature_5', 'feature_6', 'feature_7', 'feature_8', 'feature_9', 'feature_10', 'feature_11', 'feature_12', 'feature_13', 'feature_14', 'feature_15', 'feature_16', 'feature_17', 'feature_18', 'feature_19', 'feature_20', 'feature_21', 'feature_22', 'feature_23', 'feature_24', 'feature_25', 'feature_26', 'feature_27']
- """
这里的feature name是我们最初的时候就设定的。下面打印一下特征的重要程度。
- print('Feature importances : ', list(gbm.feature_importance()))
- """
- Feature importances : [67, 31, 11, 86, 19, 173, 26, 18, 9, 57, 16, 19, 4, 50, 40, 14, 0, 38, 15, 27, 5, 0, 160, 15, 133, 201, 130, 136]
- """
网格搜索(lightGBM与Sklearn结合)
这一部分单独讲一下将lightGBM与sklearn进行结合,使用GridSearchCV来进行参数的寻找。下面还是具体讲一个例子来进行说明。
例子参考来源 : Microsoft LightGBM with parameter tuning (~0.823)
导入库
- import numpy as np
- import pandas as pd
- import lightgbm as lgb
- import matplotlib.pyplot as plt
- from sklearn.model_selection import train_test_split
- from sklearn.metrics import mean_squared_error
- from sklearn.model_selection import GridSearchCV
导入数据集, 创建dataset
- # 读入数据
- df_train = pd.read_csv('../binary_classification/binary.train', header=None, sep='\t')
- df_test = pd.read_csv('../binary_classification/binary.test', header=None, sep='\t')
- y_train = df_train[0]
- y_test = df_test[0]
- x_train = df_train.drop(0, axis=1)
- x_test = df_test.drop(0, axis=1)
- # 创建数据集
- lgb_train = lgb.Dataset(x_train, y_train, free_raw_data=False)
- lgb_eval = lgb.Dataset(x_test, y_test, free_raw_data=False, reference=lgb_train)
定义模型参数和搜索空间
首先我们将模型需要使用的参数存在字典中,方便我们之后的使用。
- params = {'boosting_type': 'gbdt',
- 'max_depth' : -1,
- 'objective': 'binary',
- 'nthread': 3, # Updated from nthread
- 'num_leaves': 64,
- 'learning_rate': 0.05,
- 'max_bin': 512,
- 'subsample_for_bin': 200,
- 'subsample': 1,
- 'subsample_freq': 1,
- 'colsample_bytree': 0.8,
- 'reg_alpha': 5,
- 'reg_lambda': 10,
- 'min_split_gain': 0.5,
- 'min_child_weight': 1,
- 'min_child_samples': 5,
- 'scale_pos_weight': 1,
- 'num_class' : 1,
- 'metric' : 'binary_error'}
接着,我们定义需要搜索的参数的范围。
- gridParams = {
- 'learning_rate': [0.005],
- 'n_estimators': [40],
- 'num_leaves': [6,8,12,16],
- 'boosting_type' : ['gbdt'],
- 'objective' : ['binary'],
- 'random_state' : [501], # Updated from 'seed'
- 'colsample_bytree' : [0.65, 0.66],
- 'subsample' : [0.7,0.75],
- 'reg_alpha' : [1,1.2],
- 'reg_lambda' : [1,1.2,1.4],
- }
最后,我们定义模型,在这里传入参数不能传入dict作为参数, 需要取出每个参数对应的值。
- mdl = lgb.LGBMClassifier(boosting_type= 'gbdt',
- objective = 'binary',
- n_jobs = 3, # Updated from 'nthread'
- silent = True,
- max_depth = params['max_depth'],
- max_bin = params['max_bin'],
- subsample_for_bin = params['subsample_for_bin'],
- subsample = params['subsample'],
- subsample_freq = params['subsample_freq'],
- min_split_gain = params['min_split_gain'],
- min_child_weight = params['min_child_weight'],
- min_child_samples = params['min_child_samples'],
- scale_pos_weight = params['scale_pos_weight'])
参数的搜索, 保存最优参数
接下来就可以进行参数的搜索
- # Create the grid
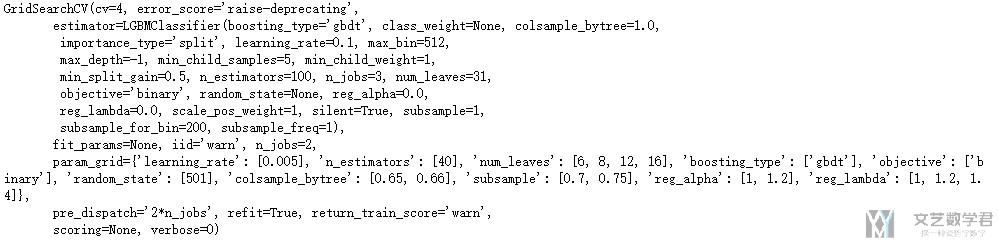
- grid = GridSearchCV(mdl, gridParams,
- verbose=0,
- cv=4,
- n_jobs=2)
- # Run the grid
- grid.fit(X_train, y_train)
接着我们查看相对结果最好的参数:
接着我们打印出最好的结果,同时将最优的参数赋值到初始的dict中。
- print(grid.best_params_)
- print(grid.best_score_)
- """
- {'boosting_type': 'gbdt', 'colsample_bytree': 0.65, 'learning_rate': 0.005, 'n_estimators': 40, 'num_leaves': 16, 'objective': 'binary', 'random_state': 501, 'reg_alpha': 1.2, 'reg_lambda': 1, 'subsample': 0.75}
- 0.6068571428571429
- """
参数的赋值, 之后我们再训练分类的时候,就可以直接使用params这个dict了。
- # Using parameters already set above, replace in the best from the grid search
- params['colsample_bytree'] = grid.best_params_['colsample_bytree']
- params['learning_rate'] = grid.best_params_['learning_rate']
- # params['max_bin'] = grid.best_params_['max_bin']
- params['num_leaves'] = grid.best_params_['num_leaves']
- params['reg_alpha'] = grid.best_params_['reg_alpha']
- params['reg_lambda'] = grid.best_params_['reg_lambda']
- params['subsample'] = grid.best_params_['subsample']
- # params['subsample_for_bin'] = grid.best_params_['subsample_for_bin']
查看一下最终的效果:
- print('Fitting with params: ')
- print(params)
- """
- Fitting with params:
- {'boosting_type': 'gbdt', 'max_depth': -1, 'objective': 'binary', 'nthread': 3, 'num_leaves': 16, 'learning_rate': 0.005, 'max_bin': 512, 'subsample_for_bin': 200, 'subsample': 0.75, 'subsample_freq': 1, 'colsample_bytree': 0.65, 'reg_alpha': 1.2, 'reg_lambda': 1, 'min_split_gain': 0.5, 'min_child_weight': 1, 'min_child_samples': 5, 'scale_pos_weight': 1, 'num_class': 1, 'metric': 'binary_error'}
- """
使用最优参数训练, 进行模型融合
在经过上面的步骤后,我们找到了最优的参数,下面我们使用这组最优的参数,进行模型的训练(每次训练使用不同的数据集), 最后将不同数据集训练的结果进行融合, 求出最优的解。
- # Kit k models with early-stopping on different training/validation splits
- k = 4
- predsValid = 0
- predsTrain = 0
- predsTest = 0
- for i in range(0, k):
- print('Fitting model', k)
- # Prepare the data set for fold
- XX_train, XX_vali, yy_train, yy_vali = train_test_split(X_train, y_train,
- test_size=0.4)
- lgb_train = lgb.Dataset(XX_train, yy_train)
- lgb_eval = lgb.Dataset(XX_vali, yy_vali, reference=lgb_train)
- # Train
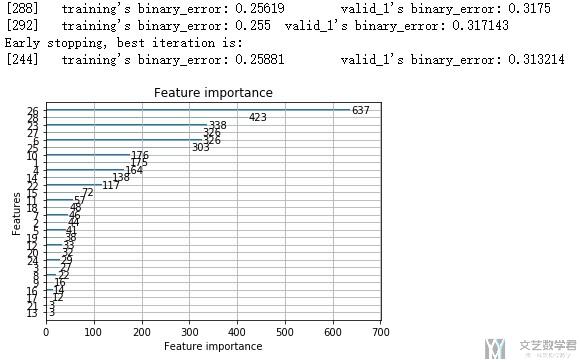
- gbm = lgb.train(params,
- lgb_train,
- 100000,
- valid_sets=[lgb_train, lgb_eval],
- early_stopping_rounds=50,
- verbose_eval=4)
- # Plot importance
- lgb.plot_importance(gbm)
- plt.show()
- # Predict
- predsValid += gbm.predict(XX_train,
- num_iteration=gbm.best_iteration)/k
- predsTrain += gbm.predict(XX_vali,
- num_iteration=gbm.best_iteration)/k
- # 这里相当于是一个加权的过程
- predsTest += gbm.predict(x_test,
- num_iteration=gbm.best_iteration)/k
可以看到每一轮的结束,都会打印出系数的重要度。
模型的保存
最后进行模型的保存即可。
- pd.DataFrame(np.int32(predsTest > 0.5)).to_csv('sub.csv', header=None, index=None)
还是十分建议查看这一节开头给出的参考资料。
- 微信公众号
- 关注微信公众号
-

- QQ群
- 我们的QQ群号
-


评论