文章目录(Table of Contents)
Deep Dream原理介绍
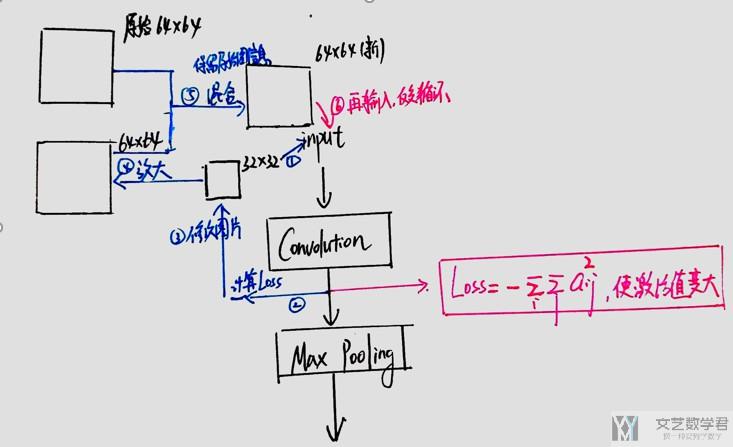
其实Deep Dream大致的原理和CNN可视化Convolutional Features是有些相似的,这个是希望整个layer的激活值都很大,而Feature的可视化是希望某个layer中的某个filter的激活值最大。
其实两个都差不多了。Deep Dream简单的步骤如下图所示,说一下第5步,我个人感觉是为了保证最后的图片可以保持原来图片的样子,所以每次都需要进行Blend。
整个过程是一个递归的过程,具体的实现可以看后面讲的实现。
代码实现
导入使用的库
- import torch
- from torchvision import models, transforms
- import torch.optim as optim
- import numpy as np
- from matplotlib import pyplot
- %matplotlib inline
- from PIL import Image, ImageFilter, ImageChops
定义超参数
- CUDA_ENABLED = True
- # Deep dream configs
- LAYER_ID = 28 # The layer to maximize the activations through
- NUM_ITERATIONS = 5 # Number of iterations to update the input image with the layer's gradient
- LR = 0.2
- # We downscale the image recursively, apply the deep dream computation, scale up, and then blend with the original image
- # to achieve better result.
- NUM_DOWNSCALES = 20
- BLEND_ALPHA = 0.5
定义Deep Dream的类
这里我们使用预训练好的vgg16网络来进行测试。我们首先定义基类,定义好一些变量和图像的转换。
- class DeepDream:
- def __init__(self, image):
- self.image = image
- self.model = models.vgg16(pretrained=True)
- if CUDA_ENABLED:
- self.model = self.model.cuda()
- self.modules = list(self.model.features.modules())
- # vgg16 use 224x224 images
- imgSize = 224
- self.transformMean = [0.485, 0.456, 0.406]
- self.transformStd = [0.229, 0.224, 0.225]
- self.transformNormalise = transforms.Normalize(
- mean=self.transformMean,
- std=self.transformStd
- )
- self.transformPreprocess = transforms.Compose([
- transforms.Resize((imgSize, imgSize)),
- transforms.ToTensor(),
- self.transformNormalise
- ])
- self.tensorMean = torch.Tensor(self.transformMean)
- if CUDA_ENABLED:
- self.tensorMean = self.tensorMean.cuda()
- self.tensorStd = torch.Tensor(self.transformStd)
- if CUDA_ENABLED:
- self.tensorStd = self.tensorStd.cuda()
- def toImage(self, input):
- return input * self.tensorStd + self.tensorMean
接着继承上面的类,定义正向传播与梯度更新的过程,这里使用了Adma来进行梯度的更新。
- class DeepDream(DeepDream):
- def deepDream(self, image, layer, iterations, lr):
- transformed = self.transformPreprocess(image).unsqueeze(0) # 转换后的图片
- if CUDA_ENABLED:
- transformed = transformed.cuda()
- input = torch.autograd.Variable(transformed, requires_grad=True)
- self.model.zero_grad()
- optimizer = optim.Adam([input.requires_grad_()],lr=LR)
- for _ in range(iterations):
- optimizer.zero_grad()
- out = input
- for layerId in range(layer):
- out = self.modules[layerId + 1](out)
- loss = -out.norm() # 让负的变小, 正的变大
- loss.backward()
- optimizer.step()
- # input.data = input.data + lr * input.grad.data
- input = input.data.squeeze()
- input.transpose_(0,1)
- input.transpose_(1,2)
- input = self.toImage(input)
- if CUDA_ENABLED:
- input = input.cpu()
- input = np.clip(input, 0, 1)
- return Image.fromarray(np.uint8(input*255))
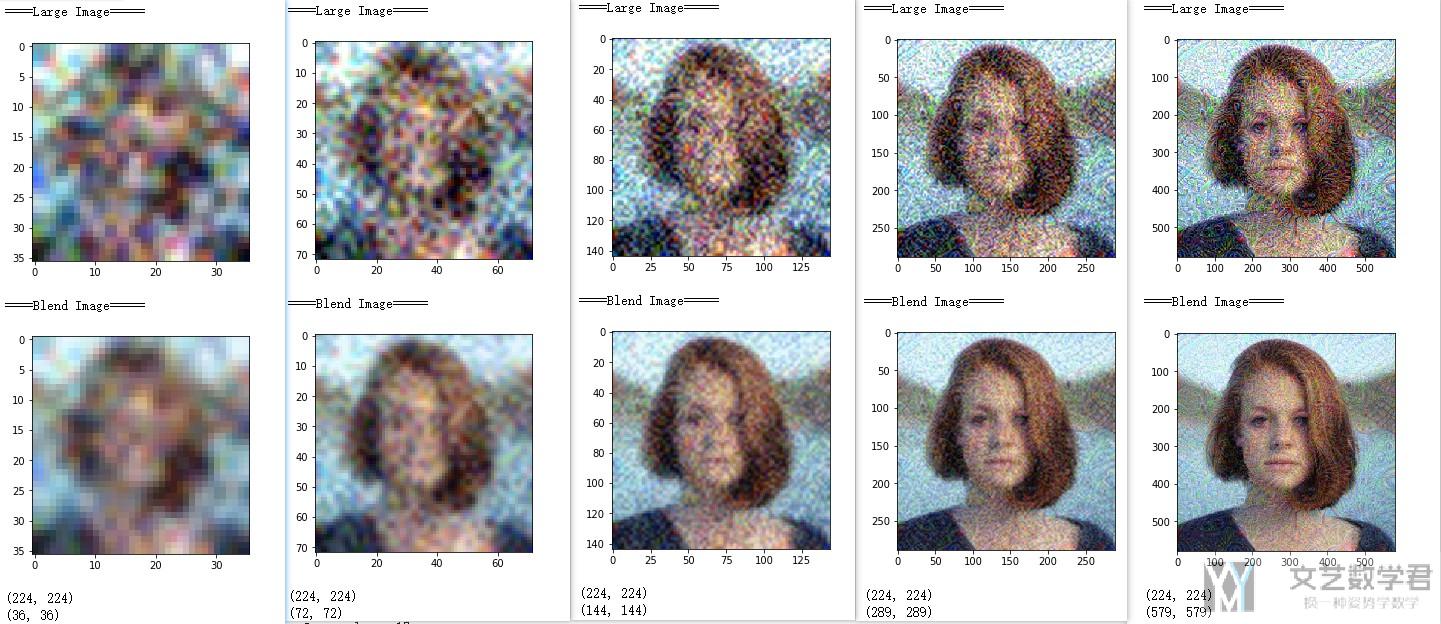
为了让结果更好,我们需要从一张小的图片进行反复迭代来生成最后的deep dream的图片。我在中间加了一些可视化的过程,会逐步打印出中间的图片,来查看一个变化的过程。
- class DeepDream(DeepDream):
- def deepDreamRecursive(self, image, layer, iterations, lr, num_downscales):
- if num_downscales > 0:
- # scale down the image
- image_small = image.filter(ImageFilter.GaussianBlur(2)) # 高斯模糊
- small_size = (int(image.size[0]/2), int(image.size[1]/2))
- if (small_size[0] == 0 or small_size[1] == 0):
- small_size = image.size
- image_small = image_small.resize(small_size, Image.ANTIALIAS)
- # run deepDreamRecursive on the scaled down image
- image_small = self.deepDreamRecursive(image_small, layer, iterations, lr, num_downscales-1)
- print('Num Downscales : {}'.format(num_downscales))
- print('====Small Image=====')
- pyplot.imshow(image_small)
- pyplot.show()
- # Scale up the result image to the original size
- image_large = image_small.resize(image.size, Image.ANTIALIAS)
- print('====Large Image=====')
- pyplot.imshow(image_large)
- pyplot.show()
- # Blend the two image
- image = ImageChops.blend(image, image_large, BLEND_ALPHA)
- print('====Blend Image=====')
- pyplot.imshow(image)
- pyplot.show()
- img_result = self.deepDream(image, layer, iterations, lr)
- print(img_result.size)
- img_result = img_result.resize(image.size)
- print(img_result.size)
- return img_result
- def deepDreamProcess(self):
- return self.deepDreamRecursive(self.image, LAYER_ID, NUM_ITERATIONS, LR, NUM_DOWNSCALES)
进行生成
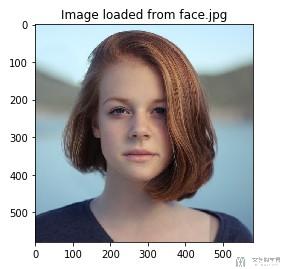
- # 导入图片
- IMAGE_PATH = 'face.jpg'
- img = Image.open(IMAGE_PATH)
- pyplot.imshow(img)
- pyplot.title("Image loaded from " + IMAGE_PATH)
进行生成最终的结果。我们看一下最后的结果。整个过程图片是由小变大。
- img_deep_dream = DeepDream(img).deepDreamProcess()
- pyplot.imshow(img_deep_dream)
- pyplot.title("Deep dream image")
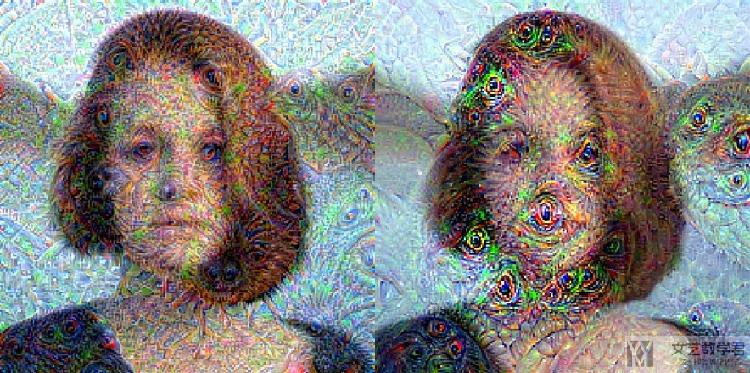
最后,我们看一下最终生成图片的效果。首先是原始的图片。
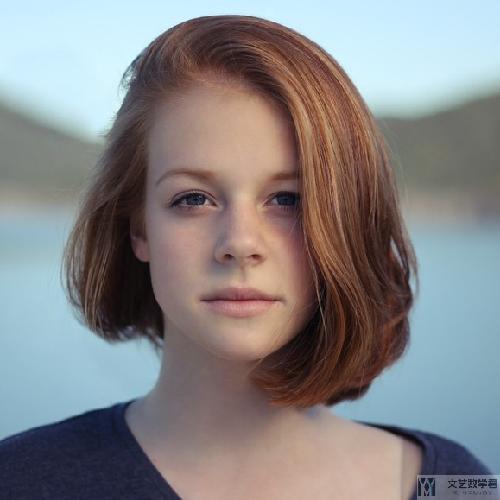
然后是生成的图片。其实不是很好看。
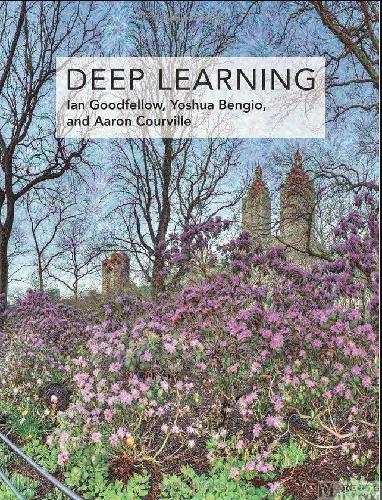
关于deep dream,一个使用的地方,应该都很熟悉吧,deep learning书籍的封面就是使用这种技术进行生成的。
代码链接:Deep Dream的介绍
- 微信公众号
- 关注微信公众号
-

- QQ群
- 我们的QQ群号
-


评论